

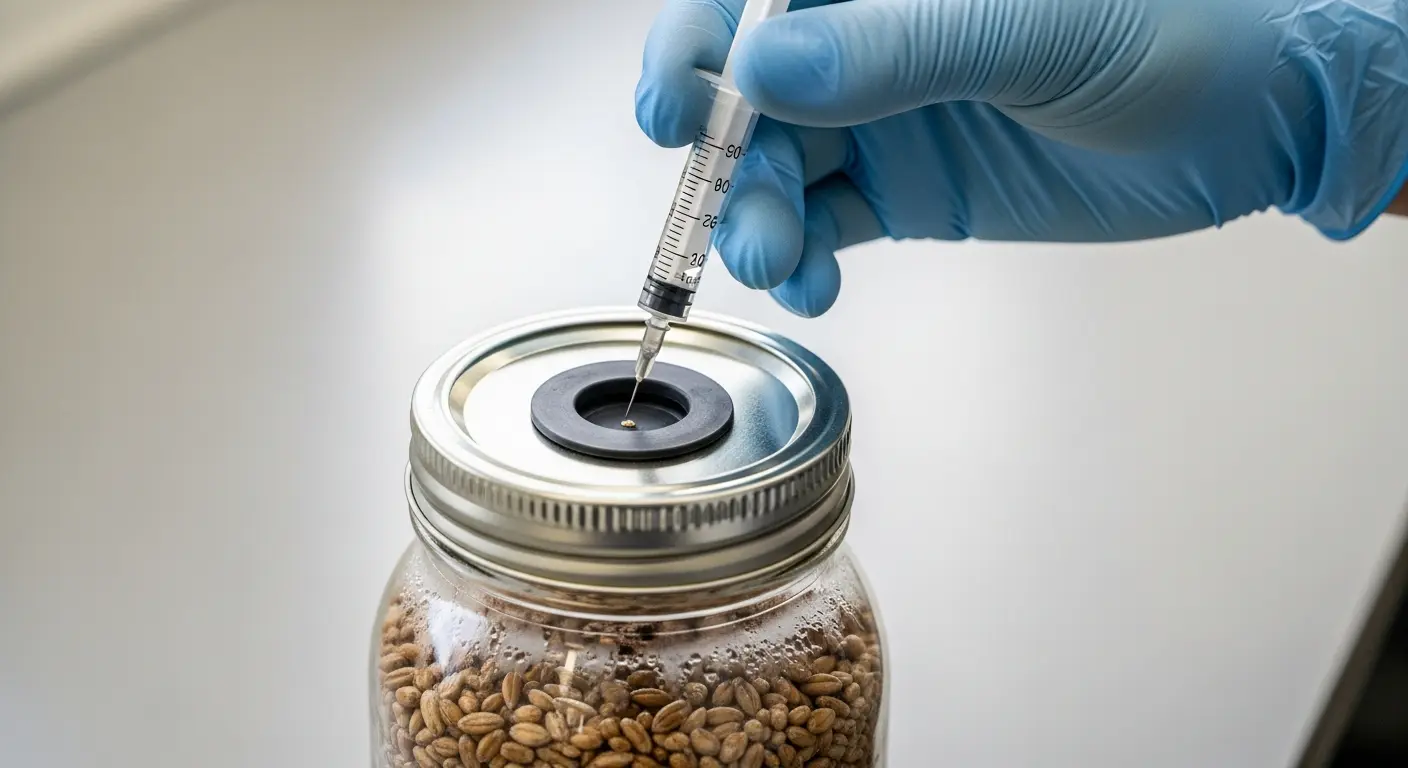
Can you take a spore syringe straight to spawn and skip the lab steps entirely? Yes, and plenty of beginners do exactly that with grain jars or all-in-one grow bags. The catch is that this shortcut trades convenience for a higher chance of contamination and a slower start, since spores have to germinate before any real colonization begins. I ran three separate grain jars this way over a six-week stretch, and the results were mixed enough to explain why experienced growers keep steering newcomers toward agar first. This guide walks through exactly what happens inside that syringe, what to expect at each stage, and where things typically go wrong.
What a Spore Syringe Actually Contains
A spore syringe holds mushroom spores suspended in sterile water, not living mycelium. Under a flashlight, you’ll usually spot faint dark specks or a slightly cloudy haze settled near the bottom of the barrel. That distinction matters more than most beginner guides admit: spores are dormant until they land on a food source and start to germinate, while liquid culture already contains mycelium that’s actively growing the moment it hits grain. That single difference is why a spore syringe straight to spawn approach almost always colonizes slower than liquid culture, sometimes by two to three full weeks depending on species and spore viability at the time of purchase. Older syringes, especially ones sitting in a fridge for months, tend to germinate even slower, so checking the print date before buying is worth the extra minute.
Why Straight-to-Spawn Feels Like the Easy Route
It’s easy to see the appeal. Skipping agar means no petri dishes, no scalpel work, and no waiting around for a healthy isolate before moving to grain. My first attempt used exactly this logic: I had a syringe, a bag of sterilized rye, and twenty minutes to spare on a Sunday afternoon. Injecting straight into the grain bag felt almost too simple compared to the sterile transfer techniques described in most cultivation forums. For someone testing the hobby without investing in a full lab setup, that simplicity is genuinely the biggest draw, and it’s exactly why most beginner kits are built around this method from the start. Even the instructions printed on cheap all-in-one grow bags usually assume this exact workflow, which tells you how mainstream the shortcut has become among first-time growers.
Read also: Ingredients in Vullkozvelex Safe to Use
The Real Risks of Skipping Agar
The tradeoff shows up fast if contamination sneaks in. Spores aren’t sterile just because they came in a sealed syringe; bacterial or mold spores can ride along in the same solution without anyone noticing until it’s too late. Agar exists precisely to catch that problem early, since contamination becomes visible on a plate long before it spreads through an entire bag of grain. Skip that step and you’re relying on grain alone to reveal a problem, by which point you’ve usually lost the whole jar rather than a small, cheap petri dish. In my second attempt, faint green patches showed up around day nine, and the entire jar had to go. That single loss cost more grain than three properly sterilized agar plates combined, which is the math most straight-to-spawn guides conveniently leave out.
Step-by-Step: Injecting a Spore Syringe Into Spawn
The actual process is straightforward once you’ve done it once. Start by shaking the syringe firmly, since spores settle to the bottom between uses and need to redistribute evenly through the solution. Flame-sterilize the needle tip until it glows faintly, then let it cool for a few seconds before touching anything. Insert it through the injection port on your grain bag or jar, pushing in a small amount of solution, usually two to three milliliters rather than dumping the entire syringe into one container. Too much liquid creates excess moisture, which becomes its own contamination risk. After injecting, seal the port and move the container to a stable, warm spot for incubation. Resist the urge to check on it daily; every extra peek at the injection site is another chance for something unwanted to sneak in through the port.
How Long Colonization Actually Takes
Patience matters more here than with almost any other cultivation method. Germination typically takes five to fourteen days before you’ll see the first hints of white fuzz forming around the injection site. Early colonization usually stretches another two to three weeks after that, and full colonization of a standard grain jar can take anywhere from three to six weeks total. My slowest jar took forty-one days start to finish, while a nearly identical jar from the same syringe finished in twenty-six. Temperature stability, spore age, and grain type all shift that timeline, which is why comparing notes with other growers using the exact same syringe can be misleading. Two jars inoculated on the same day, sitting six inches apart, can still finish weeks out of sync from each other.
Spore Syringe vs Liquid Culture vs Agar
Each method solves a different problem. Liquid culture already contains active mycelium, so it typically colonizes grain the fastest and gives the most predictable timeline of the three. Agar sits in the middle: it demands more equipment and patience upfront but lets you visually confirm a clean, vigorous culture before committing valuable grain to it. Spore syringe straight to spawn skips both of those safety nets in exchange for speed of setup and a lower initial cost. None of these approaches is universally better; the right choice depends on how much contamination risk you’re willing to accept in exchange for fewer steps and less equipment. Growers who plan to run the same genetics repeatedly usually shift toward agar or liquid culture after a season or two of direct injection.
Signs Your Grain Is Colonizing Cleanly (or Not)
Healthy mycelium spreads as bright white, stringy or slightly fluffy growth that expands evenly outward from the injection site rather than staying clumped in one spot. Occasional yellow droplets, known as metabolites, are normal and don’t automatically signal a problem. Green, black, pink, or orange patches are a different story entirely, and any of those colors showing up is a strong sign the jar needs to be discarded rather than salvaged. Uneven colonization, where one side of the jar races ahead while the other stays bare for weeks, often points to inconsistent spore distribution during the original injection rather than contamination itself. Shaking the syringe thoroughly before drawing up your dose helps avoid this particular headache more than any other single step.
Mistakes That Ruin a Straight-to-Spawn Attempt
Most failures trace back to a handful of repeatable errors. Injecting too much solution is the most common one, since excess moisture creates exactly the damp conditions bacteria thrive in. Poorly sterilized grain is a close second, particularly when growers rush the pressure-cooking step to save time. Opening the container repeatedly to check progress introduces fresh contamination risk with every peek, even when hands and tools seem clean. Giving up on a slow-growing jar too early is another quiet mistake, since some syringes simply take longer without anything actually being wrong with the culture inside. I nearly tossed my slowest jar at week four, only for it to fully colonize two weeks later with no issues at all.
Conclusion: Is Spore Syringe Straight to Spawn Worth It?
Taking a spore syringe straight to spawn works, and plenty of successful grows prove it. It’s the simplest entry point into mushroom cultivation, requiring almost no lab equipment and very little prior experience. The real cost is patience and risk tolerance: slower colonization, a higher chance of contamination, and less control over which genetics end up dominating the grain. For a first attempt or casual hobby grow, that tradeoff is usually worth it. For anyone planning to grow consistently, learning basic agar work sooner rather than later will save both grain and frustration down the road, and it’s a lesson most of us end up learning the expensive way first.
Frequently Asked Questions:
Can you put a spore syringe straight into spawn?
Yes. Injecting directly into sterilized grain jars or all-in-one grow bags is a common beginner method and works without needing agar first.
Is spore syringe straight to spawn slower than liquid culture?
Yes, usually by two to three weeks. Spores need to germinate before colonization starts, while liquid culture already contains active mycelium.
How much spore solution should I inject into grain?
Two to three milliliters per injection point is typical. Overdoing it adds excess moisture, which raises the risk of bacterial contamination.
What does contamination look like in a grain jar?
Green, black, pink, or orange patches are red flags. Occasional yellow liquid droplets are normal and don’t necessarily mean the jar is contaminated.
How long does full colonization take with this method?
Most jars finish somewhere between three and six weeks, though individual timelines vary based on temperature, grain type, and spore viability.
Should beginners eventually learn agar techniques?
Yes. Agar lets you catch contamination early and select stronger genetics, which pays off once you’re growing on a regular basis.
See also: Wapbald: The Digital Publishing Platform Changing How Creators Reach Readers